
Pool Leak Testing for Hidden Water Losses
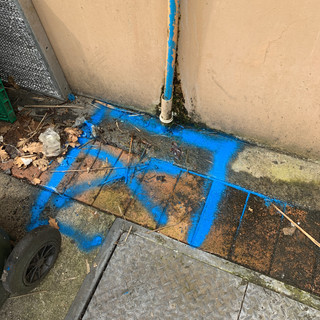
A pool that needs topping up every few days can turn from a minor annoyance into a costly property problem. Pool leak testing gives you a clear answer on whether water loss is caused by normal evaporation, a leak in the pool structure, faulty fittings or underground pipework. That distinction matters before anyone starts digging up paving, cutting concrete or replacing equipment that may not be at fault.
For Auckland pool owners, water loss can be difficult to judge. Wind, warm weather, splash-out and backwashing all affect the water level. However, a steady drop that continues when the pool is not being used should be investigated. The sooner the source is found, the more options there are to repair it with minimal disruption.
When Pool Leak Testing Is Needed
Most swimming pools lose some water through evaporation. The amount varies with the season, pool exposure, water temperature, wind and whether the pool is covered. A heated pool in a windy, sunny position can lose noticeably more water than a shaded, covered pool.
A leak becomes more likely when the water level drops consistently regardless of weather, or when you are regularly adding water to maintain the level. Other warning signs include wet or soft ground near the pool, unexplained dampness around paving, air bubbles returning through the pool jets, a falling water level that stops at a particular point, or a pool pump that needs frequent priming.
For commercial properties, the signs may be less obvious. A facilities team may first notice increased water use, ongoing plant room moisture, unexplained algae growth around the pool surround or recurring problems maintaining water chemistry. In these situations, testing is often the quickest way to narrow down the issue before it affects operations or creates a larger maintenance bill.
A useful first check is the bucket test. Place a bucket of pool water on a step so the water inside the bucket sits at the same level as the pool water outside it. Mark both levels and leave it for 24 hours, ideally with the pool not in use. If the pool level falls more than the level inside the bucket, water is likely escaping somewhere other than through evaporation.
This test can indicate a problem, but it does not locate the leak. Rain, strong wind, automatic top-up systems and changing pool operation can also distort the result. It is a starting point, not a diagnosis.
What a Pool Leak Test Checks
A proper investigation starts with the pool itself and works through the possible escape paths. The aim is to identify not only that a leak exists, but where it is located and whether it is related to the shell, a fitting, plumbing or attached equipment.
The technician will usually inspect visible areas first. This includes the skimmer, return jets, lights, steps, coping, tile line, expansion joints, suction points and hydrostatic fittings where applicable. Cracks, deteriorated sealant and loose fittings are not always the source of water loss, but they can provide useful clues.
The point where the water level stops falling can also be significant. If the level settles at the bottom of a skimmer opening, around a light fitting or at a return jet, that feature deserves close attention. If it continues to fall below the fittings, the issue may be lower in the shell or in a separate plumbing line.
Testing then becomes more targeted. Dye testing can help show whether water is being drawn into a crack, gap or fitting. A small amount of dye is placed near the suspected area while the water is still. If a leak is present, the dye may move towards it. This is particularly useful around fittings and visible shell defects, although it is not always suitable for leaks hidden behind finishes or below ground.
Pressure testing is commonly used for pool plumbing. Individual suction and return lines can be isolated and tested to determine whether they hold pressure. A pressure loss points to a plumbing fault, while a stable result can rule that line out and focus attention elsewhere. This prevents unnecessary excavation based on assumptions.
Where pipework is concealed under paving, lawns, concrete or pool surrounds, specialist equipment can help locate the line and investigate the likely fault area. Acoustic listening equipment may detect the sound of water escaping under pressure. Trace-wire pipe location technology can identify the route of compatible underground services, and moisture testing can help confirm whether water is affecting nearby ground or building materials.
The right method depends on the pool construction and the symptoms. A concrete pool, fibreglass pool and vinyl-lined pool each have different common failure points. Likewise, a leak that occurs only while the pump is running requires a different approach from a leak that continues with the equipment switched off.
Is the Leak in the Pool or the Pipework?
One of the most useful parts of pool leak testing is separating a structural issue from a pipework issue. The repair methods, cost and level of disruption can be very different.
If the water loss increases while the filtration system is operating, pressurised return lines, pool heating lines or equipment connections may be responsible. A leak on the suction side can behave differently. It may draw air into the system rather than push water out, causing air in the pump basket, poor circulation or difficulty holding prime.
If water loss continues at a similar rate with the pump off, the pool shell, skimmer, light, fittings or static plumbing may be more likely. That is not a rule without exceptions, which is why isolation and pressure testing are valuable. They replace guesswork with evidence.
Pool surrounds can complicate the picture. Water may appear on one side of the pool while the actual leak is elsewhere, because moisture travels through backfill, under slabs or along service trenches. Repairing the wettest visible spot without testing can mean fixing the wrong area.
Why Non-Invasive Testing Saves Money
The old approach to hidden pool leaks was often to start removing paving or excavating where the leak was assumed to be. That may eventually find the problem, but it can also create avoidable damage, extra reinstatement work and delays.
Non-invasive testing is designed to reduce that risk. By testing the pool, isolating pipework and using appropriate detection equipment, a technician can establish the most likely fault location before repair work begins. In some cases, the repair may be as straightforward as resealing a fitting or correcting a connection. In others, a damaged underground line may need repair or replacement. The key is that the scope is based on the test result rather than a broad search.
This is particularly valuable where the pool is surrounded by expensive tiles, exposed aggregate, landscaped gardens or a recently completed deck. It also matters for commercial sites, where access restrictions, public safety and downtime need to be managed carefully.
Water Leaks Auckland uses specialist diagnostic methods to investigate concealed pool and pipework leaks before recommending a repair approach suited to the condition of the system and the property budget.
What to Do Before the Technician Arrives
You do not need to drain the pool or attempt temporary repairs before testing. In fact, keeping the pool in its normal operating condition often helps the investigation. Leave the water level where it is unless it is creating an immediate safety issue, and avoid topping it up immediately before the appointment if practical.
It is helpful to note how quickly the level has been dropping, whether the pump was running, and whether the water stops at a particular level. Let the technician know about recent work such as new paving, equipment replacement, pool heating installation, resurfacing or landscaping. These details can help direct testing to the most likely areas.
If the pool has an automatic filler, switch it off where possible so the true water loss can be assessed. Keep plant room access clear and make sure any relevant valves, equipment manuals or previous repair records are available. For strata or commercial properties, arrange access to plant rooms, service areas and any spaces below or beside the pool.
Repair Decisions After Testing
Finding the leak is the first decision point, not the end of the process. A good test result should explain what has failed, where it is located, what repair options are practical and what level of reinstatement may be required.
A small fitting leak may be repaired without disturbing the pool surround. A failed underground pipe may allow for a local repair if the fault location is clear and the pipe is otherwise sound. If pipework is old, repeatedly repaired or difficult to access, replacement of a section or rerouting may provide better long-term value. There is no single right answer for every pool.
Do not keep treating regular top-ups as normal maintenance. A clear diagnosis gives you the basis to repair the actual fault, protect the surrounding property and get back to using the pool with confidence.


Comments