
Slab Leak Repair Example: Finding the Right Fix
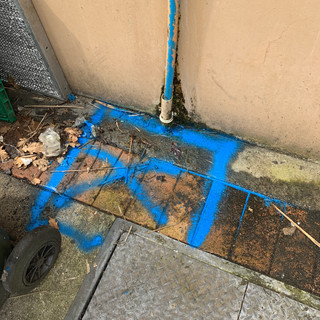
A damp patch on a concrete floor is not always a spill, condensation issue or failed waterproofing. It can be the first visible sign of a leaking pipe beneath the slab. This slab leak repair example shows why finding the exact source before any concrete is cut is usually the most cost-effective place to start.
For Auckland property owners, the concern is rarely just the leak itself. Water can travel beneath flooring, through fill, along pipe runs and into wall linings before it becomes obvious. The result may be a rising water bill, warm or wet areas underfoot, damaged floor finishes, mould risk or uncertainty about whether the building structure has been affected.
A slab leak repair example from first signs to repair
Consider a homeowner who notices that one area of their polished concrete floor feels slightly warm, even when the heating is off. There is no visible plumbing leak, but the water meter continues to move after all taps, appliances and toilets have been checked. Their water use has also increased without a clear reason.
The property has a pressurised water pipe running beneath the concrete slab. The initial temptation may be to remove flooring or start breaking concrete where the warmth is felt. That approach can be expensive and may still miss the leak. Water does not always surface directly above the damaged pipe.
A technician first isolates the internal plumbing where practical and carries out testing to confirm whether the loss is on the water supply line. Acoustic listening equipment can then be used to listen for the sound created as pressurised water escapes from a pipe. Pipe tracing equipment helps establish the likely route and depth of the line beneath the slab, while moisture testing and thermal imaging can help identify how far moisture has spread.
In this example, the testing identifies a narrow acoustic point near a kitchen island, with the pipe route confirmed beneath the slab. The warm floor area is nearby, but not directly above the leak. The source is a small pinhole in an older copper pipe.
That information changes the repair discussion. Rather than removing a large area of flooring and concrete, the owner has a defined location, a probable cause and repair options based on access, pipe condition and budget.
Why accurate location matters before concrete cutting
A slab leak can be difficult to diagnose because several issues can produce similar symptoms. A failed shower waterproofing system, leaking waste pipe, moisture rising through the slab, roof-water entry or plumbing leak inside a wall can all cause dampness. Repairing the wrong problem first wastes time and can create unnecessary disruption.
Non-invasive leak detection is designed to reduce that uncertainty. It does not mean a repair will never require access through a slab, wall or floor. It means access work is planned around evidence rather than guesswork.
For residential properties, this can protect expensive finishes such as tiled floors, timber flooring, cabinetry and carpet. For commercial sites, it can reduce closure time, minimise disruption to tenants or customers, and help facilities teams make a clearer decision about repair scope.
The exact test method depends on the property and the suspected leak. Acoustic equipment works well when water is escaping from a pressurised pipe and the sound can travel through the surrounding material. Thermal imaging may show temperature differences caused by hot-water leaks or evaporative cooling. Moisture meters help map wet areas in walls and floors. Trace-wire pipe location equipment can locate certain underground services where a suitable tracer wire or signal is available.
No single tool is right for every job. A practical diagnosis combines the test results with the building layout, pipe materials, water-meter behaviour and visible signs of moisture.
The repair options after a slab leak is found
Once a leak has been accurately located, the best repair is not always the same. In the example above, there are three realistic approaches: local access and repair, rerouting the pipe, or replacing a larger section of pipework.
Localised access and pipe repair
Where the pipe is otherwise in sound condition and the leak location is precise, a small, controlled opening through the slab may allow the damaged section to be repaired. This can be a sensible option for a newer installation or a one-off fault caused by damage, a poor joint or a manufacturing defect.
The trade-off is that the concrete and floor finish still need to be opened and reinstated. If the pipe is old and has multiple areas of corrosion, a local repair may solve today’s leak without preventing another failure elsewhere.
Rerouting the affected line
A reroute takes the leaking pipe section out of service and runs a new line through a more accessible route, such as a ceiling space, wall cavity or perimeter area. This often avoids breaking through the slab, which can be particularly valuable where flooring is difficult to match or the affected area is beneath fixed cabinetry.
Rerouting is not automatically cheaper. It depends on pipe access, the length of the new run, building layout and reinstatement requirements. However, it can be the more durable option when pipes beneath the slab are ageing or difficult to access safely.
Replacing ageing pipework
If testing and site history indicate a wider pattern of pipe deterioration, replacement may be the better long-term decision. This is more significant work, but it can reduce the risk of repeated leaks and multiple call-outs. It is worth considering in older homes or commercial properties where original pipework has reached the end of its practical service life.
A good repair recommendation should explain what has been found, what area is affected, which option addresses the immediate leak and which option is likely to provide better value over time. The lowest upfront price is not always the lowest overall cost if further failures are likely.
What happens after the repair
Repairing the pipe is only part of the process. The line should be pressure tested to confirm the leak has been resolved. If the water meter was moving before the repair, a further meter check provides another useful confirmation.
Moisture affected by a slab leak can take time to dry, especially beneath impervious flooring or inside wall linings. The drying period depends on the volume of water lost, the materials involved, ventilation and whether moisture has entered adjoining building elements. A surface that looks dry is not always dry below the finish.
Where there has been substantial moisture, further moisture testing may be sensible before new floor coverings, cabinetry or wall linings are reinstated. This helps avoid trapping moisture where it can contribute to odours, mould growth or damage to finishes later.
For commercial premises, documenting the test result, leak location, repair completed and final verification can also help with maintenance records and planning future asset replacement.
Signs that point to a possible slab leak
A slab leak is not always dramatic. Some leaks run for weeks or months before there is obvious damage. Property owners should arrange testing when there is unexplained water loss, a water meter that moves when water is not being used, warm areas on a concrete floor, damp or lifting flooring, recurring mould near a floor or wall junction, or a persistent sound of water when fixtures are off.
These signs do not prove that a pipe beneath the slab is leaking. They do show that the source needs to be identified properly. This is particularly relevant where a property has had previous plumbing repairs, older copper pipework, high water pressure or an unexplained increase in water charges.
Water Leaks Auckland uses targeted, non-invasive testing to locate concealed water problems before unnecessary excavation or demolition is considered. With more than 30 years of industry experience, the focus is on establishing where the water is coming from, then discussing repair or replacement options that suit the property and budget.
If you suspect water is escaping beneath a concrete floor, act before a small loss becomes a larger repair. A clear diagnosis gives you a practical starting point and helps ensure any access work is done in the right place.


Comments